Sashkin - Fotolia
Learn the basics of Azure Container Instances
The popularity of containers continues to prompt major cloud providers to offer new services. See how Azure's most recent release -- Container Instances -- aims to ease deployment.
The quickest way to launch a containerized application on Azure is with a new service called Azure Container Instances. With the service, enterprises can run one or more containers on managed server infrastructure.
One of the biggest benefits of Azure Container Instances is that you don't need to build your own VM and install Docker before you run a container. Instead, you can spin up a new container directly from the the Azure portal or with a single command in the Azure command-line interface (CLI). Microsoft takes care of the underlying infrastructure, enabling you to focus solely on the containers that run your application.
Azure Container Instances vs. Azure Container Service
In addition to Azure Container Instances, Microsoft offers Azure Container Service (ACS) to help teams run containers at scale in the cloud. To choose between the two, assess the complexity of your containerized application.
For example, consider an application that consists of multiple services that require a large number of containers. Typically, this type of architecture distributes containers that support each service across multiple container hosts. With ACS, you can deploy a cluster of VMs and select a container orchestrator, such as Kubernetes, DC/OS or Docker Swarm. From there, there are tools and features you can use for scheduling, health monitoring, failover, scaling and service discovery.
Azure Container Instances starts almost instantly, and Microsoft only bills on a per-second basis, which makes them economical for smaller-scale production apps, development and test scenarios and makes them a good fit to complement an existing ACS implementation. On the other hand, organizations that deploy long-running containerized workloads should consider ACS and a dedicated cluster of VMs.
Azure Container Instances is still in preview, and Microsoft continues to work on a Kubernetes API connector for the service. This will enable teams to deploy large-scale services with ACS and quickly handle spikes and variable load with Azure Container Instances.
How Azure Container Instances works
Container groups are the top-level construct where you'll deploy container instances, which support both Linux and Windows images. These container groups can be comprised of one or more containers, and all of the containers will run on the same underlying host machine. This means every container instance deployed into the same container group will also share the same local network and storage volumes.
You can configure each container group with a public IP address. For example, you could deploy two container instances into a container group and have the first container instance run a web application that users interface with over the internet. The second container instance, which perhaps runs a database or in-memory cache, would be reachable on the inside network from the first container instance.
Deploy your first container instance
It's very simple to spin up Azure Container Instances. You can create instances in the Azure portal from the Azure CLI or from PowerShell.
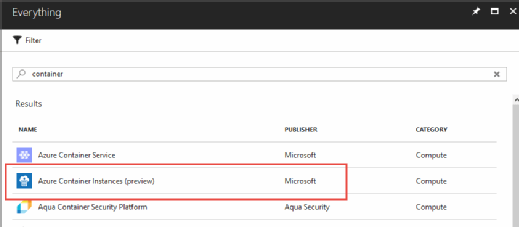
To get started, simply do a search for container in the portal, and select Azure Container Instances, as in Figure 1.
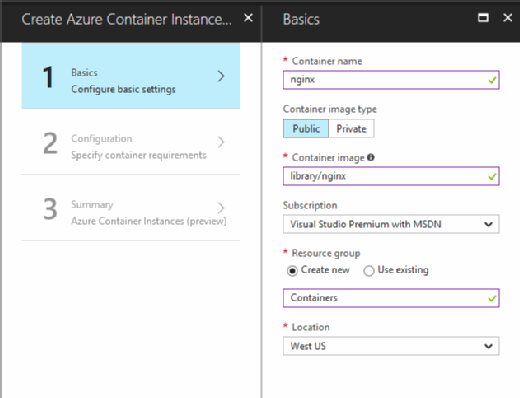
Next, provide a name for your container, as seen in Figure 2. Select Public to expose a public IP address. For the container image, you can use the tag of a public image in the Docker hub, or you can reference a Uniform Resource Identifier to a private image you have in Azure Container Registry.
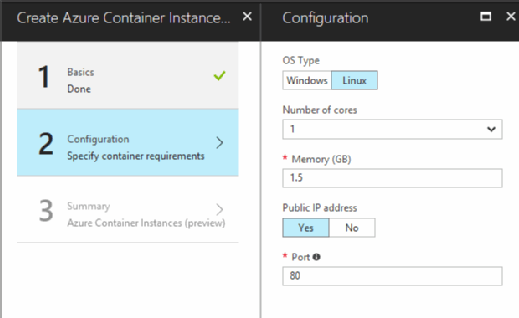
Then, select the OS type and the number of CPU cores and memory that should be assigned to your container instance. You can also customize the port that will be exposed via your public IP address, as in Figure 3.
On the final screen in Figure 4, review your settings, and click OK to deploy your container instance.
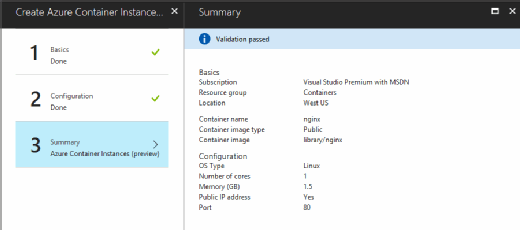
As you can see, this is a simple process. The equivalent Azure CLI commands to create a resource group and deploy a container instance are:
az group create --name Containers --location eastus
az container create --name nginx \
--image library/nginx \
--resource-group Containers \
--ip-address public
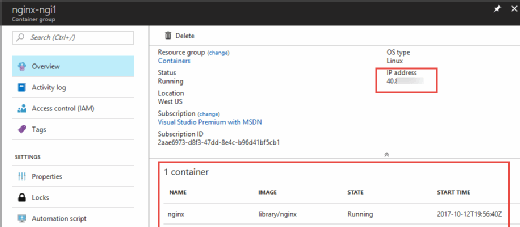
Your container instance should start almost immediately. Navigate to your resource group, drill into the container group, and you'll see the live container. You can obtain the public IP address from the screen in Figure 5 and visit the Nginx sample page over the internet.
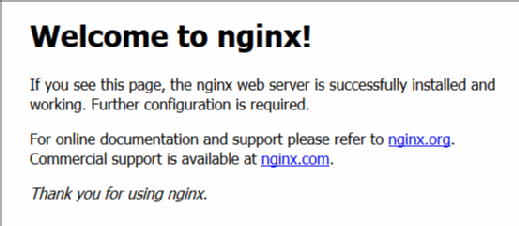
You should see a page like Figure 6 in your web browser.
