
Gunnar Assmy - Fotolia
Build a custom VM image for Azure deployments
Follow this step-by-step guide to create a custom virtual machine image for Microsoft Azure deployments.

While enterprises can choose to use a prepared Azure Marketplace image, creating a custom VM image gives cloud administrators more control.
Creating a custom image has many steps, but the benefits are worth the time and effort if a company wants something tailored to its needs. For example, when an admin plans to deploy several identical machines that have a lot of manual configuration, a custom image can reduce the potential risk of errors.
Admins can create images locally or in the cloud, depending on their needs. Additionally, they can use customized images with templating to quickly deploy infrastructure that shares the same base deployment image.
This guide will demonstrate how to create a custom image locally and walk through the steps to upload the image into Microsoft Azure. Then, we will deploy our customized virtual machine image into the cloud. In this example, we'll build a Windows image, but you can follow the same process for Linux images.
Step 1. Create the Windows image
For this tutorial, I used Hyper-V on Windows 10 Pro to create a Windows VM image. Before you get started, be aware of the following support factors.
- Only Linux and Windows images are supported for upload and use in Azure.
- Only the first generation of VMs are supported.
- Azure only supports VHD files, not VMX.
- Select "fixed size" rather than "dynamic" because dynamic expanding -- i.e., thin provisioned -- disks are not supported.
Step 2. Use the Windows Sysprep tool
Once you create a Windows VM and configure it, use the Windows Sysprep tool to ensure all the required unique items on the disk VM are reset and randomized to avoid conflicting settings issues. Sysprep can be found in \Windows\System32\sysprep.exe. Don't take a snapshot before doing this, as it will cause issues with the Azure upload. If required, copy the whole VM to another location.
Step 3. Convert to VHD format
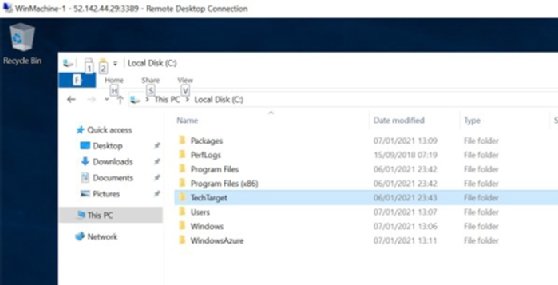
Shut down the VM and copy only the VHDX file to a convenient location, such as the desktop.
To convert the file to the required Azure VHD format, use PowerShell and the Convert-VHD cmdlet. You can specify the options in the command line. However, running it as is will enable you to specify both the input VHDX file and the output VHD image file for upload to Azure.
The disk image that is created needs to be uploaded into Azure Blob storage. That way, when it's time to make the new templated server, we can easily reference the VHD file. It is possible, and usually desirable, to store several uploaded disks in one Blob storage account.
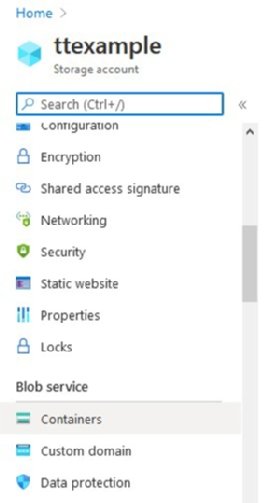
Step 4. Create a container under the Blob storage account
If you don't have an Azure storage account, create one in the Azure Portal. Make sure it is set up in the same Azure region as the items you are using for this example.
Once the storage account is available, navigate to the Azure Storage blade and create a Blob storage account. Create a container under the account. It should look similar to Figure 1.
Click the + container button to create a new container.
Step 5. Upload the blob
Blob uploading can be a challenge for those who are unfamiliar with it. One way is to upload via the GUI, but this lacks a lot of functionality. The GUI is also prone to timeouts and lacks any real status reporting. It is much easier and more efficient to use the Add-AzureRmVhd command in PowerShell. Install the PowerShell Azure modules if not yet installed.
This command has a number of benefits:
- It creates a checksum prior to uploading to ensure integrity.
- It accommodates empty disk space -- no uploading of unused data in the image.
- It provides a progress bar.
Using the command is simple, as shown in the example below:
Add-AzureRmVhd -ResourceGroupName "TT_EXAMPLE" -Destination "https://ttexamplestorage.blob.core.windows.net/ttexample/win.vhd" -LocalFilePath 'C:\Users\Stuart\Desktop\TT.vhd'
It only requires a couple of arguments, the resource group, the blob destination, where the file is to be uploaded to and the local disk. If you aren't sure what your destination is, this code will give you the directory to use:
$container= Get-AzureRmStorageAccount –ResourceGroupName 'TT_EXAMPLE' –Name 'ttexamplestorage' | Get-AzureStorageContainer -Container $ContainerName
Use the above code snippet and echo "$container" at the PowerShell command line to provide the blob details you need.
Step 6. Convert the uploaded VHD to a VM image
Once the upload is complete, the administrator needs to convert the uploaded VHD to a VM image. Open the Azure Portal and select the images icon. If you don't see it, use the Azure search box and type "images."
Click the Add button from the ribbon to create the image. On the new images page, click create image in the center of the page. It will open a new dialog box. Fill in the first part with your subscription details.
Step 7. Add instance details and deploy
Next, fill in the instance details, such as the image name and region. Be sure to select the same region that you uploaded the image to. It's also important to set the correct image type -- Linux or Windows. Leave everything else as is. You can select HDD rather than SSD to save money, depending on your cost needs. Ensure the VM generation is set to 1.
Use the browse button to select the uploaded disk from the storage BLOB. Click the Review and create button to execute the task. This will also highlight any issues you will encounter.
You can also incorporate Puppet, SaltStack and other configuration tools. Simply follow the install before packaging up the Windows server. Some tools will automatically search for the DNS entry -- "salt" for SaltStack, for example -- on boot, which makes it easier to connect and configure. In order to use such infrastructure, it will need to be already set up and running within the Azure subnet.
After a short while, the custom image is created in Azure and you can easily deploy one or more VMs from the image.